As promised in my previous blog post, I have been really excited to share my pictorial tutorial with you that I created for our Fab Friday Tutorial at the Cuttlebug Challenge Blog. I'll admit, this is the most extensive tutorial I've ever done...lol...you'll see as you keep on scrolling.
I fell in love with this Stationary Box that was originally designed by Jackie Topa and I wanted to share with you my version that I created with the February Kit from Art Freckles called "Ticket to Whoo-ville."
This is the outside......
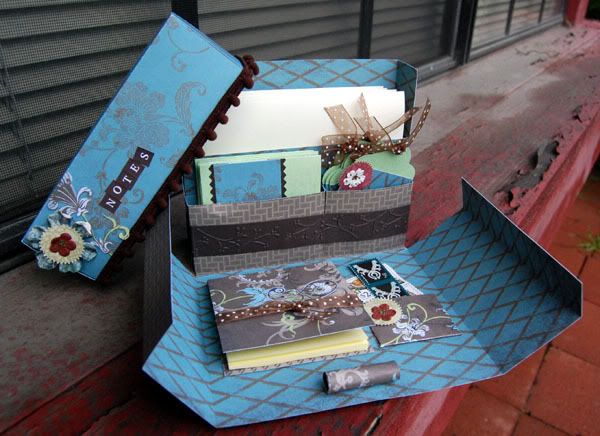
....and this is what the inside looks like.
I created a pictorial tutorial for you if you'd like to make one for yourself. Go grab a cuppa cuz this is going to be a long one. :)
Supplies Needed: (for the stationary box holder and top only)
* 3 pieces of 12x12 cardstock and/or coordinating patterned paper. (In my example, I used only
patterned papers from the Art Freckles kit.)
* Paper Trimmer with trimming AND scoring blade
* Scoring bone to crease your folds
* Red sticky double sided tape
* Embellishments to decorate the outside of your Stationary Box. (In my example, all embellishments except for Prima flower are from the Art Freckles kit.)
Additional Supplies Needed: (for set of 4 tags, 4 qty 3x3 cards and 4 qty 4.25 x 5.5 cards)
* 3 sheets of 12x12 cardstock for card and tag bases.
* Additonal patterned papers and embellishments as required to create these items.
NOTE: The cards and tags will NOT be covered in this tutorial.
PART A: Making the Stationary Box Unit
Step #1: Take your first piece of 12 x 12 paper and SCORE IT @ 3 inches and 9 inches.
Step #2: Flip this same piece of 12 x 12 paper around, now SCORE IT @ 5 inches and 7 inches.
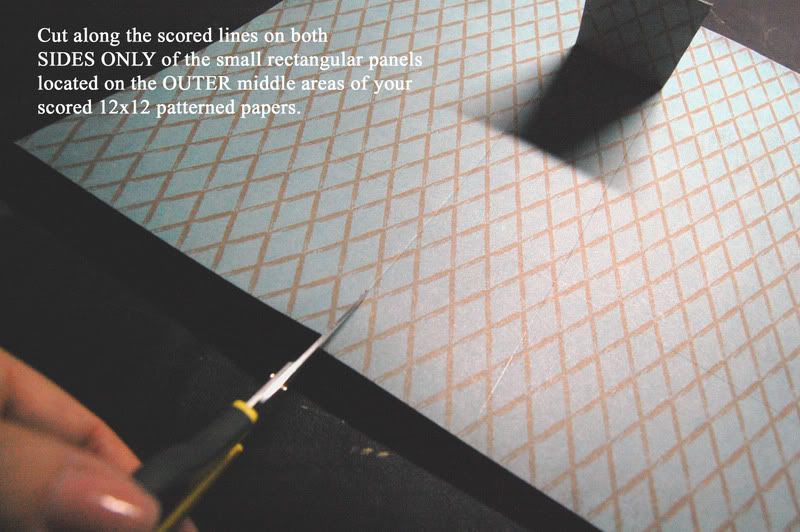
Step #3:
 Step 4:
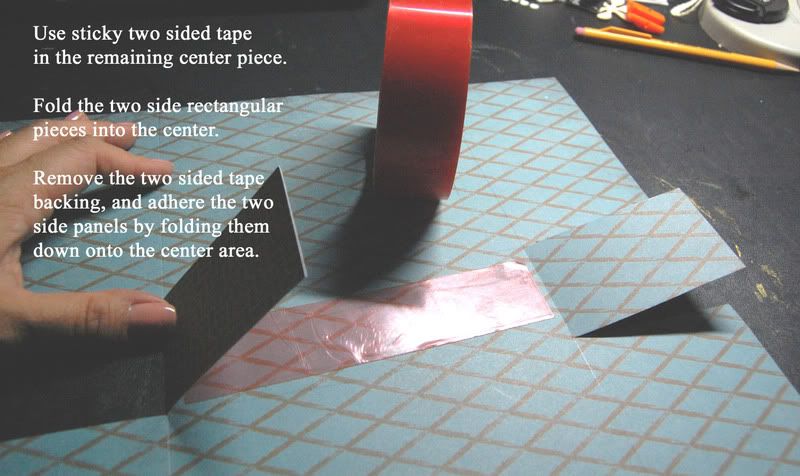
 Step 5:
 fold and glue it down like this.
Step 6:
Step 6:

Step 7:

Step 8:

Step 9:

Step 10:

Step 11:

Step 12:

Step 13:
I used the branch border from the Just My Type
Cuttlebug folder set to emboss a long length of matching brown cardstock to decorate the front of my shorter "shelves."
(please disregard all the contents in my Stationary box for now.)
Step 14:

Whoohooo! We're almost there to the finish!!
Let's make our Stationary Box top now, shall we?
PART C: Stationary Box Top
Step 1:

Step 2:

Step 3:

Step 4:
 Alrighty, we're at the last stretch. Let's make our inside flap doodads, i.e. post it note holder, stamp holder and pen loop.
Here's what the inside doodads look like to keep you motivated to continue on with our little project. :)

PART D: Inside Doodads
Step 1: Cut into a coordinating piece of cardstock or patterned paper at 3.25 x 6.25 dimensions. Score it in the middle, and put a pad of 3x3 post it notes inside. I decorated the top of my post it note holder with some ribbon. Glue the covered pad onto the LEFT side of your inside flap opening of our stationary box.
Step 2:
Step 3:

The stamp pocket is glued to the RIGHT side of the flap and the pen loop is glued nearer the bottom of the flap (when open) as pictured.
Yeeaahh!! We're done! Now, please go ahead and make a few 3x3 cards to insert in the LEFT smaller pocket shelf, some embellished tags for the RIGHT smaller pocket shelf, and some 4.25 x 5.5 cards for your larger pocket shelf in the back. You're on your own for these items as they are not a part of this tutorial. If you loved the specific supplies I used for my Stationary Box, please visit
Art Freckles to see their February
"Ticket to Whoo-ville" monthly kit. Shannon, Renee, Linda, and Kimberly are the nicest gals around.
Art Freckles will also be hosting a Cyber Crop at the end of March! Be sure to join us then for lots of fun challenges and prizes!!

Thank you for sitting in with me THIS long for this Stationary Box tutorial. Please join us NEXT Friday, and EVERY Friday, for our
Cuttlebug Challenge Blog's Fab Friday series.
 Stationary Box (Most items are from Feb Art Freckles Kit)
Paper: Upsy Daisy "Man About Town" Patterned Papers
Embellishments: Maya Road & May Arts Ribbon; Kaiser Pearl Bling; Rose Moca Tiny Alpha Stickers
Accessories: Cuttlebug Just My Type Embossing Folder; Scoring Blade; Red Double Sided Sticky Adhesive Tape
Size: various






.jpg)


