
 My net was intermittent and mostly down this past weekend so I'm playing catchup with my bloggity blog tonight. I'm shooing away the janitorial staff here at work so that I can blog in peace!!!
It looks like the Nook's site is down due to some site upgrading work, so I'd like to share my Layout Page class here. (Whew! I had just posted my class on the message board, and then the board didnt' work anymore! lol...surely I didn't break it right?)
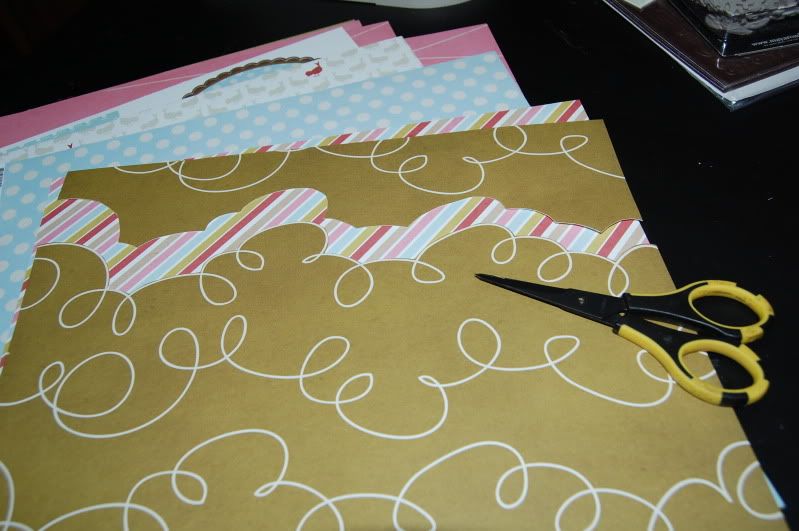
Materials Needed: (from Nook's May Kit)
* Lily Bee Diagonal Striped PP
* Lily Bee Olive Green with Squiggly lines like clouds PP
* Bazzil Blue Embossed Cardstock
* Lily Bee Brown with white birds PP
* Lily Bee Frame Die Cuts
* Lily Bee Olive Green with trees PP (you will need 2x2 of this)
* Scallop Edge Scissors/Border Punch
* Maya Road (one each of tree and tree shrubs) chipboard
* A few pieces of blue Kaiser bling (I used 4 gems on my layout)
* 3 of the Puffy Velvet Maya Road flowers
* BG Chipboard alpha
* 2 blue or coordinating colored buttons
* Pencil (not included in kit)
* Creative Chaos Journalling Spots (not included in kit)
* Prima Flower Vine (not included in kit)
Step 1: Trim off the top portion of the "clouds" of the olive green pp by cutting along the squiggly lines
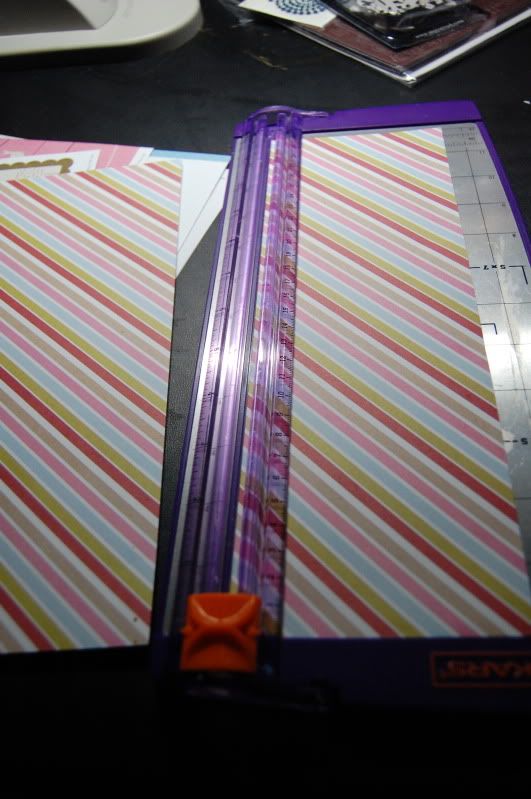
Step 2: Prepare the other PP's by cutting them to size.
* Trim off 4 x 12 inches of the diagonal striped pp
* Trim off 1.5 x 12 inch of the diagonal striped PP
* Trim off 1.5 x 12 inch of the Bazzill embossed cardstock
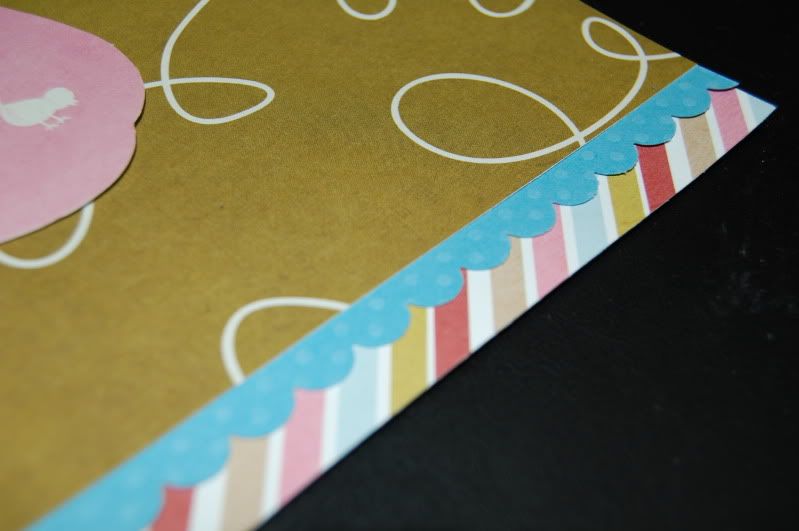
 Step 3: Use a scalloped edge pair of scissors or border punch to create a scalloped border on the Bazzill embossed cardstock like this:
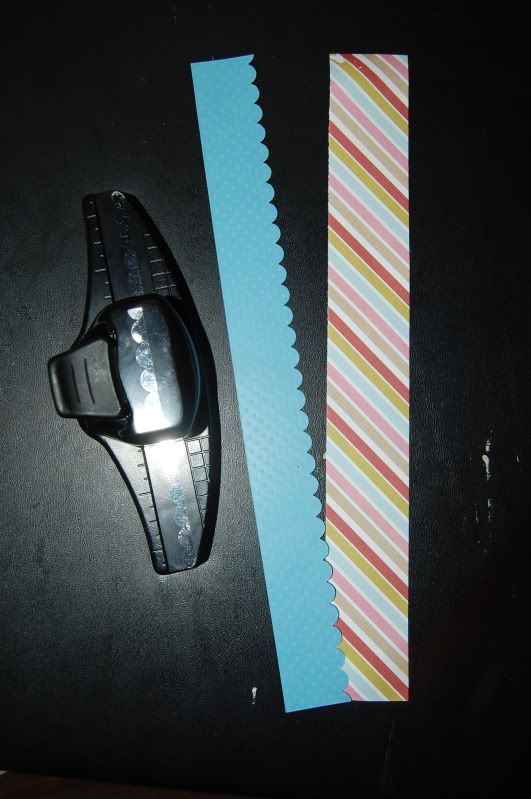
Step 4: Glue the scalloped Blue embossed cardstock (with scallops facing towards bottom of the page) onto the diagonally striped 1.5 x 12 inches border, so that the straight edge of the blue cardstock is flush with the border of the diagonally striped pp.
Then glue the straight edge bottom of the Green Olive PP on top of this newly prepared blue cardstock/diagonally striped border like this:
Step 5: Glue the larger piece of the olive green paper that now has a squiggly border on top of the 4 x 12 diagonal striped PP you cut out in Step #2 like this:

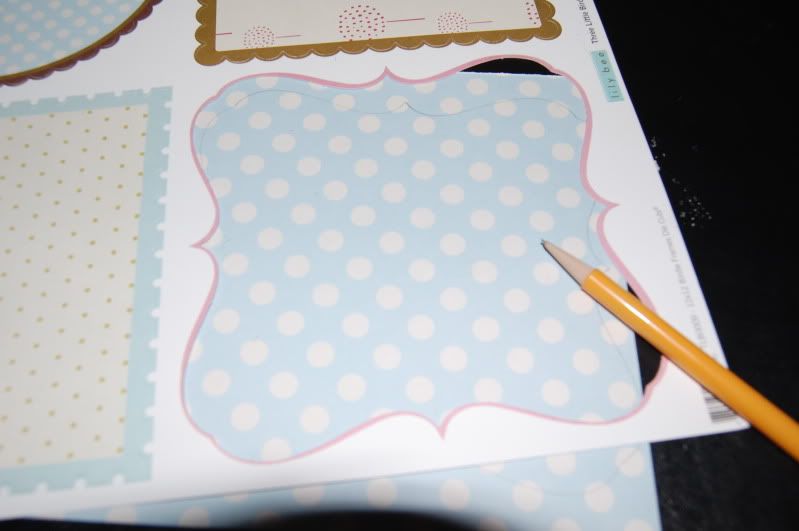
Step 6: Pop out the Pink label shaped Frame die from the die cut paper.
Use the negative opening to trace a 2nd shape with your pencil onto the back side of the diagonally striped paper that you have left - the back side is the baby blue with white polka dots.
Trace it and cut it out.
Step 7: Adhere your Blue with white polka dots and Pink label shaped frames onto your page like this (or however it better suits your pictures):

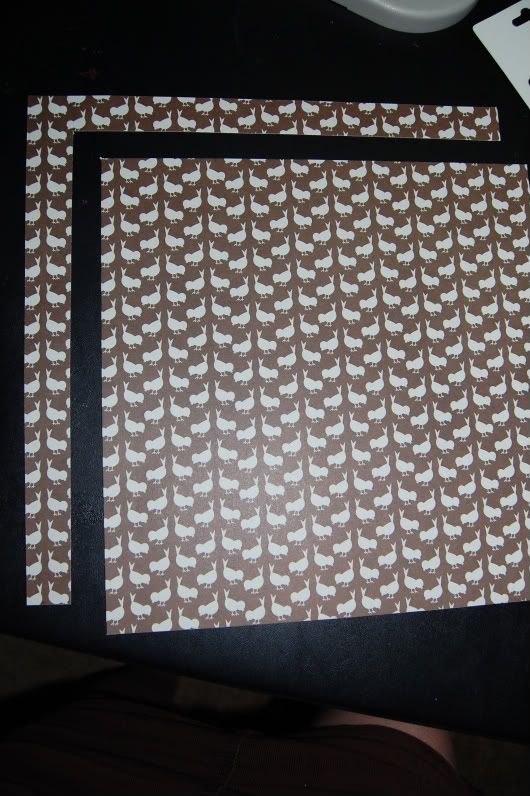
Step 8: I thought for an extra oomp, I wanted to add another patterned paper and color to tie in the brown of the tree I'm going to add a bit later, so I trimmed off an "L" shape (its about 1.5 inches width) from the brown with white birds PP like this:
 Step 9: I trimmed about .5 inches from the left and top edges of my layout that was already put together so that I could attach this brown "L" shape for added interest like this:
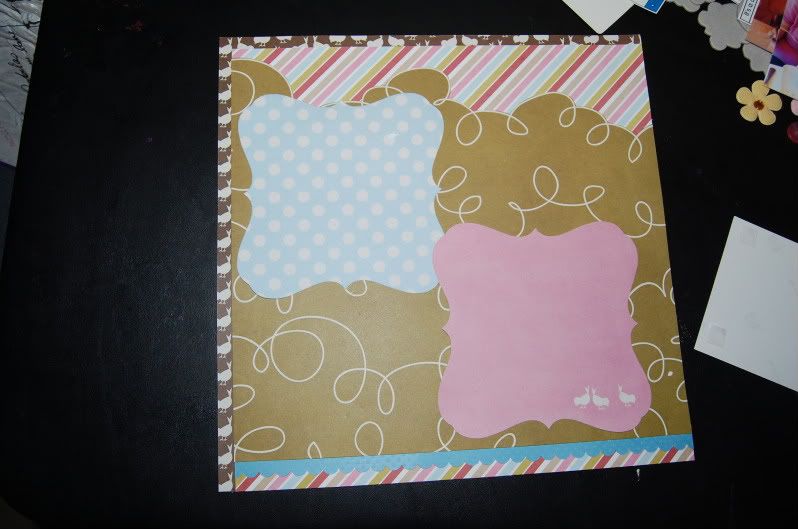 Step 10: Add pictures onto your page by playing up the label shaped photo frames you created:
 Step 11: Now add journalling spots (these were not included in the kit and came from my own stash)
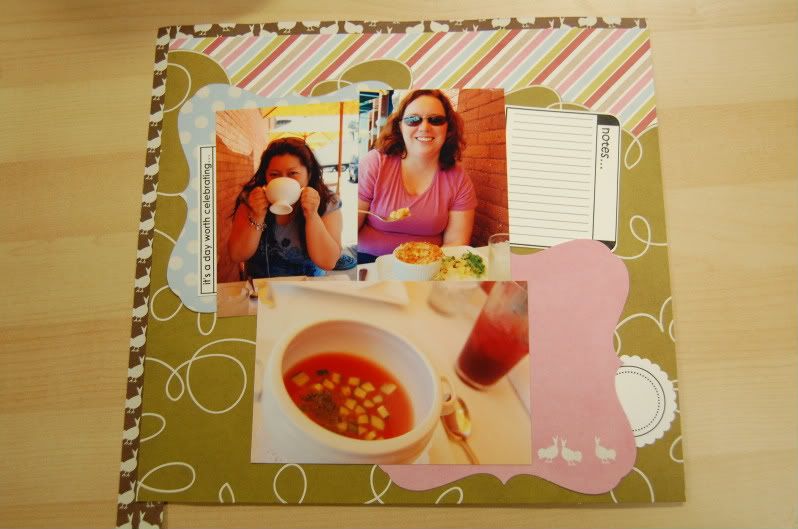 Step 12:Paint one of the Maya Road tree stumps brown with some brown acrylic paint. Cover one of the tree shrubbery "clouds" with that Lily Bee Olive Green pp with the trees on it.
TIP: I use UHU gluestick to adhere the pp's to the chipboard, and then use my BG file set to ensure clean edges of my covered chipboard.
Step 13: Now add your prepared tree, Maya Road fabric flowers, buttons, BG alphas to the layout like this to finish up your layout.
I also added a Prima viney flower from my own stash to the layout.
TIP: I added some blue Kaiser bling to cover the button holes for some added interest.
Voila! You're done!
Hope you enjoyed the class! If you enjoyed this kit featuring Lily Bee, please check out our May Kit at the Nook to get one for yourself! :) I'll be back with a few more projects from this really sweet and pretty May kit this week.
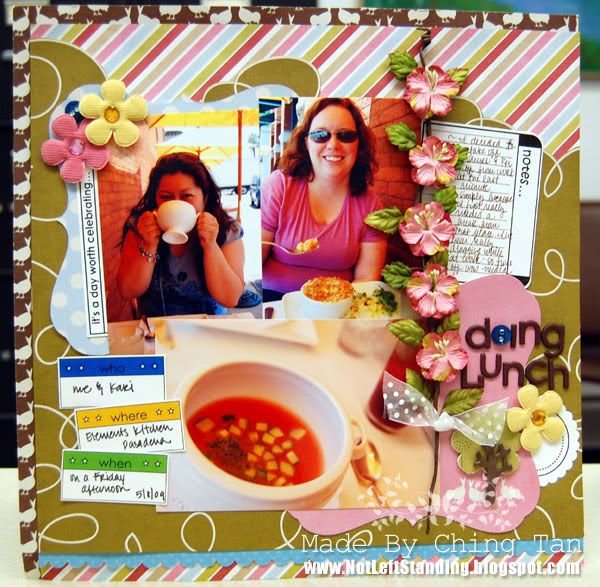
"Doing Lunch (on a Friday Afternoon)"
Paper: Lily Bee "Three Little Birds" PP; Bazzil Swiss Dots CS
Embellishments: Lily Bee "3 Little Birds" Frame Die Cuts; Maya Road Velvet Flowers & Chipboard; Misc Buttons; Kaiser Bling; MM Milk Chocolate "Piper" alpha Chipboard; Prima Vine Flowr; Creative Chaos "Perfect Little Labels" Journalling Spot
Accessories: SU Scalloped Border Punch


18 comments:
I love it Ching! Kari and you look like you had such a delicious time at lunch! Great step-by-step tutorial!
Hugs,
Karen
NICE!!! :) I love your tut. :)
great class!! love your colourful Lo!
I want one! Seriously.
Great layout and tutorial Ching! Looks like lunch was a lot of fun!
Luv the LO and tutorial Ching!
This turned out soo good :) Great tutorial!
Great layouts & love the tutorial
I absolutely love that LO! Your mix of papers is terrific!
`Ching` your LO is gorgeous..love those flowers.....
Luch looks delish!!!!
Wnderful tutorial def 10/10..Yahahah..
Have a lovely Day :) x
I tried to use the bracket shapes as frames... great idea!! I hope my layout turns out as cool as yours.
I just love it! both tutorial and layout. Amazing
Hugs
Nita
on another nook blog hop--- thanks again
Im going to cali in July Ching we should meet up!
Michelle M.
That is one cute layout and so colorful!
great layout!!!
What an awesome layout and tutorial. You create beautiful works of art!
xoxo, Christine
Yep I can now say I knew her when...this is just an incredible layout. Did you turn the pictures a pink hue? Even the pics match the layout! Color me impressed this is a stunner!
Post a Comment